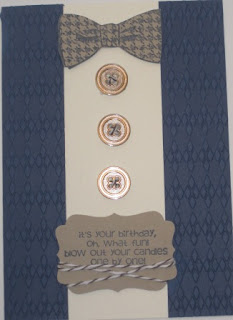
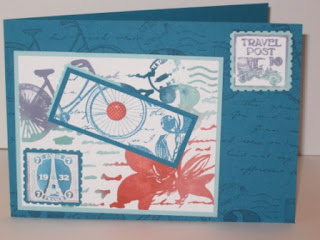
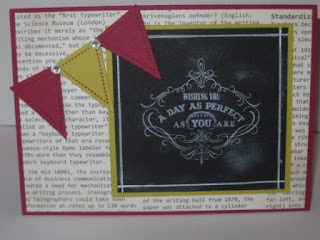
The last of the cards I made at Julie's training. This one is my favourite, we used the argyle embossing folder again and I looks great on this card.
Here are all three cards together:
Thursday, 25 April 2013
Wednesday, 24 April 2013
Dapper Dad #2
This is the second card we made using the Dapper Dad stamp set, simple but effective, I love the argyle embossing folder, (another thing I haven't got but is now on my wish list!).
I will show you the last card tomorrow.
Tuesday, 23 April 2013
Dapper Dad
More from Julie's training. We used Dapper Dad to make some masculine themed cards, again this is something I haven't got so it was good to try out something new.
Here is the first card:
I love how we stamped the watch out again then punched out watch face and stuck it on one of the large Basics Designer Buttons from the spring mini.
Here is the first card:
I love how we stamped the watch out again then punched out watch face and stuck it on one of the large Basics Designer Buttons from the spring mini.
I will show you another card we made tomorrow.
Monday, 22 April 2013
Thinking outside the Boutique Box!
I went to Julie's team training at the weekend which was lovely, (as usual). The theme was Men, which put most of us outside of our comfort zone! In the afternoon we made an interactive scrapbook page using the boutique boxes designer printed kit, Julie named it the 'Thinking Outside the Boutique Box' class. To be honest I've never really taken much notice of this kit as it just didn't catch my eye, too many feathers I think, so it is definitely something I would never have bought myself. Surprisingly in real life I liked it and for only £7,25 for the kit it is really great value. It has 8 die cut boxes, 8 note cards, 16 buttons, 4.6m of crumb cake bakers twine a 12" x 12" sheet of die cut decorations and 24 dimensionals!
I added a couple of sheets of very vanilla 12" x 12" card and an A4 sheet of crumb cake and basic grey to make my two layouts, plus some punches.
Instead of making boxes I made 6 pockets by butting some of the sides down. Julie had all six pockets on her layout, here, but I decided to do a double page layout with three pockets on each. Here are my pages, just have to find the right photo's:
Here is a close up of the pockets:
To make the pockets you have to cut the top flap off but then I stuck them back on again to make the pocket flaps. One tip though is if you want to make a finger hole at the top using a circle punch, it is much easier to do this before you stick the pocket together, (I didn't!).
Both pages together:
Thank you Julie for this great idea. I have quite a bit of the die cuts and two boxes left to make some more things too!
Sunday, 21 April 2013
More Postage Due!
This is the last card from my little set of cards made using the postage due stamp set. I stamped it in the same way as yesterdays card but because it was very blurry I stamped over it in island indigo.
Here are all three cards together, which one do you like best?
Here are all three cards together, which one do you like best?
Saturday, 20 April 2013
Faux Water Colour Postage Due
When I made the card I showed you yesterday I really liked how it looked before I heat embossed it so I thought it would be a great technique to do for my swap cards at Julie's training. The card I showed you yesterday did have a link to a tutorial but I thought I'd do a quick one here as I didn't have time to write the instructions on the back of my swaps.
This is one of my swaps, they were all a bit different and I tried a few different colour combinations but this looks like island indigo pool party, wisteria wonder and calypso coral.
First choose three or four re-inkers and put a few swirls of each onto a plastic wallet.
Then spritz with some water, the colours may mingle a bit.:
Use this to ink up your stamp, (mines from postage due):
Stamp onto whisper white card, sometimes the first one or two images are very inky like the one below, if it is too blurry you can either stamp over with versa mark and heat emboss like I showed you yesterday or stamp over again with one of the darker inks you used to give more definition, (tomorrow I will show you a card where I did this).
Here is a card I made using this technique:
I stamped the image in island indigo and cut and layered a triangle for the middle section.
This technique is great for making a few cards quickly as, depending on how much re-inker you used, you can usually get 6 or 7 images stamped from it. If you haven't got any re-inkers or only want one image you can ink your stamp using stampin write markers (lightest to darkest) then spritz stamp with water. This will give you a similar effect and you can be a bit more precise with your colours.
Friday, 19 April 2013
Faux Watercolour and Embossed Postage Due
I saw this card on the internet and thought I would give it a go. You squirt some re-inkers onto a plastic sheet, (I used a plastic wallet) and spritz with water. Use this to stamp your image onto whisper white card then allow to dry. Ink the stamp up again in versa mark ink use a stamp-a-ma-jig to line up your stamp and stamp over the inky image, heat emboss with white embossing powder. There is a little tutorial on the link to show you how to do it.
Here is my card:
It is a few weeks since I made it but I think my re-inkers where, island indigo, calypso coral, pool party and wisteria wonder, the stamp set is postage due. Here is a close up.
I really like this effect, what do you think?
Here is my card:
It is a few weeks since I made it but I think my re-inkers where, island indigo, calypso coral, pool party and wisteria wonder, the stamp set is postage due. Here is a close up.
I really like this effect, what do you think?
Friday, 12 April 2013
Mini Flip Album #2
Here is another mini flip album I made using the beau château DSP, this time lots of chickens!
The Front cover, Elements of Style stamp set again!
First page, the piece of card is tucked in the flap to show you that it isn't stuck down all the way and you can slide a photo in there:
Back page:
These little albums are so easy to make, my daughter Jessica who is 9 made a beautiful one the other day, I just helped her measure and cut.
First page, the piece of card is tucked in the flap to show you that it isn't stuck down all the way and you can slide a photo in there:
Pages opened up:
Centre page, behind the door:Back page:
These little albums are so easy to make, my daughter Jessica who is 9 made a beautiful one the other day, I just helped her measure and cut.
Thursday, 11 April 2013
Mini Flip album
We had a lovely class last night, thanks Val for having us again. Everyone made a mini flip album, it is based on a tutorial by Robin which I adapted a little bit so the cover is all in one piece, (here are my instructions with the change in). We used some retired DSP, Beau Chateau, which is gorgeous and the elementary style stamp set that compliments it perfectly. I have done two version of this album using this paper, this is the first one:
The Front cover:
First pages
Opened up:
Centre pages opened up:
This shows you all sections, I forgot to take a photo of the back pages!
The Front cover:
First pages
Opened up:
Centre pages opened up:
This shows you all sections, I forgot to take a photo of the back pages!
It is easy to make once you know how and makes a lovely keepsake, thank you Robin for sharing your idea.
Wednesday, 10 April 2013
Faux Chalkboard Technique #2
As I promised, better late than never, here is the other method we used to do the faux chalkboard technique. It is exactly the same as method 1 but stamp the image in whisper white pigment ink and smudge it, no heat embossing. It gives a more faded look so we made a more shabby looking card, the stamp set is Vintage Verses from SAB and the colour scheme is raspberry ripple and summer starfruit with some speciality DSP thrown in for good measure.
Here are the two methods together, which do you prefer?
Here are the two methods together, which do you prefer?
Tuesday, 9 April 2013
Box Card
I have been sorting out my card stock to see how much I have that is retiring after the colour refresh. I have got lots of certainly celery card (I am sure you will be seeing a lot of it over the next few months), so it seemed a great idea to enter another challenge.
Pals Paper Arts colour challenge:
I thought I would have a go at making a box card, which was really fun. I kept it quite simple but you could really go to town on it, they look complicated but are really easy. I used the mixed bunch stamp set and of course certainly celery, bashful blue and marina mist.
Just realised that I forgot to take a photo of it closed, (duh!), here is one of it partly closed before I decorated it. You could put a small gift inside, tags, confetti etc then close with ribbon or a belly band.
Monday, 8 April 2013
Serene Silhouettes aperture
I know I promised to show you method 2 for the faux chalk board effect, I'm really sorry but I will show it later in the week as I've got another challenge card to show and the deadline is looming.
For this card I have combined two challenges:
A colour challenge from
Inkspirational :
Freshly Made Sketch
For this card I have combined two challenges:
Inkspirational :
Freshly Made Sketch
For pink, banana and slate I chose melon mambo, so saffron and basic grey, this is a combination I have never used before but I really like it! I used Serene Silhouettes stamp set and lots of punches.
Here is my card:
I don't know if you can tell but the circle is actually a window, the photo below should make it clearer:
Here is a close up:
For the butterfly I stamped the image then punched out a butterfly. I also used the simply scored borders plate to emboss some lines at each side of the melon mambo strip;
I really enjoy doing challenges, I am using colour combinations I would never think of, it certainly gets the mojo working! I was really chuffed that the card I made for the last inkspiration challenge was named in the top 5.
Sunday, 7 April 2013
Faux Chalkboard Technique #1
The faux chalkboard technique is everywhere on blogland so I thought we would do it in our technique class. It is really easy to do, there are lots of tutorials out there if you have a look. We had a go at two different methods.
- Method one, swipe the black card with the embossing buddy to get rid of static, (it doesn't matter if it leaves any white marks/dust for this technique).
- Draw lines about 1/8" away from the edge of the card using a white gel pen, I smudged each line with some tissue before drawing the next line. You could use a white pencil.
- Stamp the image in versa mark (or you could use whisper white pigment ink) and heat emboss with white embossing powder.
- Use a sponge or tissue to smudge whisper white ink onto the black card.
I used the Pursuit of Happiness and pennant party stamp sets. Here is my card:
We also decorated a little memo book to match, this would make a great teacher gift, it looks like a card in this photo though!
Here is the set together?
Here is the set together?
As always we made a little ATC technique card to go in our ATC holder as a reminder of the technique. I will show you the other method we used tomorrow.
Saturday, 6 April 2013
All Dressed Up, again.....
Here is another card I made using the All Dressed up framelits and the Hello Doily stamp. I was inspired by a card made by Julie, here, mines a lot less detailed though as I made if for the craft fair as a Mother's day card, no one bought it, so I have changed it to a thinking of you card. I thought I would use the emboss resist technique on the background but it hasn't shown up that well, never mind!
Here's the card:
As you can see, it is a tri fold card, here are the three dresses close up, I used the doily stamp for the second dress:
Both cards together:
Here's the card:
As you can see, it is a tri fold card, here are the three dresses close up, I used the doily stamp for the second dress:
Both cards together:
Subscribe to:
Posts (Atom)


