Friday 10 January 2014

Spring Sneak Peak

As you may know there will be a new Seasonal, Spring/Summer catalogue launching on the 28th January. One of the great perks of being a Stampin' Up! demonstrator is that you get to see all the new products before anyone else. This is the Wedding Anniversary card that I made for Heather and Murray, I used a stamp set called Language of Love that will be in the new seasonal catalogue. The colour scheme is baked brown sugar and crisp cantaloupe:
 The stamp -a -ma-jig came in very useful to line up those hearts. The full heart and small heart punches also match  so it is quick and easy to punch out the images.

Thursday 9 January 2014

Angry Bird Punch Art

As I said in my post yesterday it was Nicholas's 7th birthday last week. I don't know about you, but sometimes I find it hard to make cards for children but punch art is a great choice as you can make lots of different characters with it and I do have a LOT of punches! There are lots of punch art ideas on pinterest so I had a look and decided on Angry Birds, here is one by Jayne.
Here is my card:
 This is a close up.

Wednesday 8 January 2014

Giggle Greetings 80th Birthday

I has a busy day on the 30th December as it was Uncle Frank's 80th Birthday, Nicholas (my cousin Sue's little boy) 7th Birthday and my cousin Heather's wedding anniversary. Heather and her husband  Murray were over from Canada for a few weeks so it was lovely to see them. Here is the card I made for Uncle Frank, I used the Giggle Greetings and Memorable Moments Stamp set:
 can you spot the sneak peak of something from Sale-a-Bration 2014? 

Tuesday 7 January 2014

Snowflake Soiree Gift Bag

Just a quick post today. This gift bag is made using one sheet of A4, I used whisper white as it is not as heavy as card stock and I found it made a better bag. I stamped all over the sheet using the snowflake soiree stamp set is Midnight Muse and Soft Sky.  
 This bag is quite easy to make when you know how and folds flat so it's easy to store. I watched quite a few tutorials on you-tube and adapted measurements to make this. I will have to do a little tutorial one day. 

Monday 6 January 2014

Tea Light Candle Card

Here is another Christmas project to show you. It's a card that has a little treat box attached. I put some tea lights in, I wrapped some washi tape around them first so they looked more Christmasy.
I wrapped washi tape around  a triangle (from the perfect pennants die) to make the tree.
I also used washi tape and linen threat to close the box rather than sticking in the ends down.
Here is the inside: 


Sunday 5 January 2014

Milk Carton Houses

I have just uploaded some photo's from my camera and found a few Christmas projects I haven't shown you yet. The first is some little houses I made using the milk carton die, I filled them with chocolate and hung them on the tree. They are not my own idea but based on a swap I saw (but wasn't given so can't tell you who made it) at convention.
Here they are:
The Christmas trees were made using the pennant party stamp set and matching punch. I did have a few more photo's but they are too blurry to show you,
I don't usually show family photo's but I thought you might like to see one of Jessica when she went to see Father Christmas at the  Cleveland Ironstone Mining Museum at Skinningrove, we had a lovely morning and it's worth going to see if you are in the area. Father Christmas said it was okay for us to take a photo so here she is:

Saturday 4 January 2014

Pocket Page Mini Album

As promised yesterday, I will show you the inside of my mini album. I made six pocket pages to go inside, ( I made the pages first then made the cover as I find it easier that way). Each pocket has a tag/insert to go inside where you can either put a photo or journalling. As I said yesterday I had a great time decorating the pages using various techniques to give it a grungy look. I used the Epic Day DSP and colour scheme, focusing on crumb cake, pool party and calypso coral. I used morning post, just the ticket, six sided sampler and baby prints stamp sets and ticket, butterfly, hezagon and circle punches and chalk talk framelits.
Here is the inside cover and first page and pocket page.  Every right hand page also has a little pocket and tag.
 The next two pages: This picture shows the back of the insert. I decorated the backs of all the inserts but I'll only show you one side of each insert, other wise there will be a dozen photo's!
The next two pages, this one shows you the back of the insert
 Next two:
Next two:
 Last double page:
Finally the last page and the inside of the back cover.
 This is the outside of the back cover, there is an extra strip of washi tape on this to cover where I had to cut the spine open as my hinge system didn't work as expected, more of that another time though.
This is the grid paper I used to cover the table, you can see I had a very inky time!
I haven't got this album anymore as I sent it to Stampin' Up! for the creative design contest, I really like it though and am contemplating making another one from the epic day DSP, not sure though as I've lots of other lovely DSP to try out.

Friday 3 January 2014

Stampin' Up! Creative Design Contest

Last year (2013!) Stampin' Up held a creative design contest open to all European Stampin' Up! demonstrators. You could enter up to two projects, a card, scrapbook page or 3D item, the only limitation being that it used only current Stampin' Up products.  They would display the entries at the Stampin' Up European Convention in Manchester, there was also a prize, (Stampin; Up shopping spree) for the winner and two runners up for each country, (UK, France, Germany, Austria and the Netherlands).  As my foot was in plaster at the time I thought it would keep me occupied so I decided to make one of my mini albums. I came up with a new hinge system which when I discovered, when I had finished the album, didn't work how I anticipated so I had to cut the cover open and do some adjustments. After putting it back together I sent it off and forgot about it. At convention I was over the moon to find out that my little album had been chosen as Runner Up!
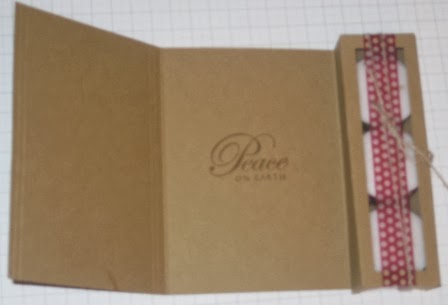
Here is my album:

I used the Epic Day DSP and washi tape, Morning Post, Baby Prints and That's the Ticket stamp sets. I made the front and back covers using the hard board we get in the glimmer card and specialty DSP to keep it flat. Its covered with Epic Day DSP, the spine is made from canvas creation which I stamped, heat embossed and sponged to match the paper. The canvas is a great material to use on the spine as it is strong but very flexible.
This is a close up of part of the canvas and front decoration. I had lots of fun using different techniques, embossing, emboss resist and sponging to give it a grungy look. I used Stampin' Up! trim to close, tie the album, it doesn't look it but it's so soft to use, I love the feel of it and added to the different textures on the cover, canvas, DSP, Embossing and washi tape. The two 'tickets' are held on with a Hung Up Cute Clip.
 This photo gives you a peak of the pages inside and is from Stampin' Up's face book page here, (you can see all the winning entries on there, there are some gorgeous projects so take a look, I love the coffee cup and the Fairy Lights).

I will tell you more about the inside pocket pages in my next post.

Thursday 2 January 2014

Winter Frost and a New Year's Gift.

The Winter Frost Specialty DSP is beautiful and I thought I would show it off in this little card. .
 I made a matching envelope using the envelope punch board.  The colour scheme is coastal cabana and silver glimmer paper for a bit of sparkle. I used the Snowflake Soiree stamp set again. 
If you would like to purchase any of the Stampin' Up products I used please contact me or visit my online shop.
As a little thank you to my blog followers and to say Happy New Year here are my class instructions to make today's and yesterdays projects using the envelope punch board. 

Wednesday 1 January 2014

Hope 2014 is a 'Cracker' of a year for you!

Happy New year to you all! 2013 was a tough year for me and the family, so I am not going to reflect on it but just say I am glad it's over. I am looking forward to 2014 and new beginnings, hopefully more blog posts as well. For New Year I thought I would share with you a little cracker and cracker card I made using the envelope punch board.  There are lots of tutorials out there on how to make a cracker using the punch board, I used this one by the very talented Stampin' Up! demonstrator Sara. I thought it was good because you can get four crackers from a sheet of 12" x 12".
Here is the cracker I made using the gorgeous DSP Winter Frost, snowflake soiree stamp set and the lovely snowflake embellishments. For the finished project I had silver ribbon wrapped around the ends of the cracker but it's missing in this picture I was waiting for some more to arrive, just use your imagination...

I also made a cracker card and envelope using the punch board,
Here they are together:
Happy New Year, Anne-Marie xxx