Sunday, 30 September 2012

New Stampin' Up! Foam Ink Pads

With the introduction of the 2012-2013 annual catalogue, Stampin' Up! have made a very big change to their Stampin’ Pads.
They are introducing firm foam pads! They change your stamping experience for the better, providing better ink coverage for your stamps! Light-tap stamping produces flawless images!  I LOVE them!!!
I will be making a Product Information Page to give you details, hints and tips on the new ink pads and other Stampin' Up Products, so keep an eye on the tabs at the top. 

Stampin' Up! Ornament Keepsakes

I have been playing with the Ornament Keepsakes stamp set and matching framelits, you can make some absolutely stunning ornaments with them, (as well as cards, scrapbook pages etc). I have made an ornament like the one on the front of the autumn and winter catalogue, they do take quite a lot of time but are well worth the effort. I am not going to show you that today though, instead I will tell you out the one I made using designer series paper, these are equally stunning but a lot quicker to make.  Just take a sheet of 12" x 12" DSP ( I used some retired paper to practise on), score it at 3", 6" and 9" and fold, then cut out your ornaments using the framelits, it will cut through all four layers so you only have to run it through the big shot 5 times to get 20, how good is that!  I used another 12" x 6" piece of DSP scored/folded at 3" to make the smaller ornament but I have since discovered a more economical version. After you have cut out your ornaments keep the paper folded and cut out some diamond shaped ornaments (it should fit between the gaps of the bigger ornament), so you only need to use one sheet of DSP. I will show you that another time as well!

A closer look, I used some loops of old olive satin ribbon, (retires today) a snow flurry die cut snowflake and a button for the centre.
Sorry I forgot to take a photo of the back but I stamped Noel from the Seasonal Greetings stamp set and punched it out with 1 3/4" circle punch and stuck it in the centre, it looked very nice, honest! These are a lot quicker to make than the stamped ornaments but of course use more costly products (DSP rather than card stock) so you have to weigh up do you want to save time or money!

Blog Hop Coming!

Check out my Blog on October 1st and take a look at the In Love With Stamping Blog Hop. I can guarantee there with be some gorgeous ideas from talented Independent Stampin' Up! Demonstrators showcasing products from the AUTUMN/WINTER CATALOGUE and the NEW 2012-2013 STAMPIN' UP! ANNUAL CATALOGUE (goes live on the 1st of October)

Monday, 24 September 2012

Pennant Parade Thank You Treat Card

I made a little thank you treat box for my stamp club members using this great tutorial by Frenchie Jo for a treat card. It is a great tutorial and so easy to make, I changed the way it fastened, gluing up both ends of the treat box and leaving the top unstuck, I used the punch out as a little pull tag to open the lid. I used the pennant parade stamp set and matching punch.


Rather than chocolates I filled the little box with some calorie free Stampin' Up ribbon!

Sunday, 23 September 2012

Joyous Celebrations Gift Card and quick tutorial

My last Joyous Celebrations creation, (for now!). This is a quick and easy gift card holder.


.

  • 10.5cm x 19cm crumb cake card
  • Score at 7cm and 14 cm, score and fold
  • On 5cm wide section punch about 1/3rd of extra large oval, place sticky strip on two sides and stick to make pocket.
  •  Decorate pocket with 2cm x 10.5cm cherry cobbler card and 1.5cm x 10.5cm of DSP.
  • Front of holder is decorated with 6.5cm x 10cm festival of prints DSP.
  • For belly band, 16cm x 2.5cm of cherry cobbler card, fold around middle of holder so ends join in the middle of the card, not too tightly. Stick together with sticky strip.
  •   Stamp the oval frame in cherry cobbler ink then December 25 image inside in early expresso, (you could use the stamp-a-ma-jig to line it up), then punch out using extra large oval. Stick this over the join on belly band.       


Saturday, 22 September 2012

More Joyous Celebrations!

Here are another two cards I made using Joyous Celebrations. For the first one I used the new core-dinations card in cherry cobbler. I embossed it using the Holiday Frame embossing folder then used the sanding block to sand off the top of the design, then mop up the dust using the dust buddy.
 This is such a quick and easy Christmas card to make. You can't really see on the picture but there is a strip of lucky limeade punched dotted scallop ribbon at the bottom, (now say that quick!).
For the next card I used the oval frame embossing folder, this time I added some early expresso card stock.

Friday, 21 September 2012

Stampin' Up! Joyous Celebrations

Finally something from the new Seasonal Catalogue to show you.  Joyous Celebrations is one of my (many) favourites from the seasonal catalogue, I love it because it is really versatile, it co-ordinates with the extra large oval punch, the holiday embossing folder and the oval designer frame embossing folder and really quick!  Of course you don't have to use any punches or folders with it, as you can see by my first card so it is a great set for those new to stamping.

For the next card I punched out the image using the extra large oval punch, the DSP is from the festival of prints DSP Stack, this a great little collection of papers 4 1/2" x 6 1/2", there are 12 different double sided papers, (so 24 designs) and you get 4 of each paper and there is a great variety.

 I'll show you some more joyous celebrations tomorrow.

Tuesday, 18 September 2012

Contempo Christmas

This is the last card we made in class, using Contempo Christmas. I part cased the Contempo Christmas Card in the 2011-2012 Stampin' Up Ideas Book and Catalogue.
 We also decorated the inside of the card as well.
We had a great time at the class and a Big Thanks to Val for letting us use her home.  The next Wednesday Class is actually next Wednesday as we have changed weeks so that we can use St Nicholas Church Hall. We usually have a great time at the Wednesday Class and if you come to five classes you get your 6th Free, if you would like to join us just send me an e-mail.

Monday, 17 September 2012

Farewell to More Stamp Sets

Here are some more cards that we made with retiring stamps.  The first one is with Something For Christmas, we teamed this with some of the Holly Bouquet DSP which is also retiring.  We inked the stamp using stampin Write Markers.

The next card uses another individual stamp, Dasher:

Sunday, 16 September 2012

Farewell Season of Joy

We were very busy at class on Wednesday making some Christmas cards with some of the retiring stamp sets.Here are two that we made using Season of Joy, I love this stamp set as it has so many great stamps in it.


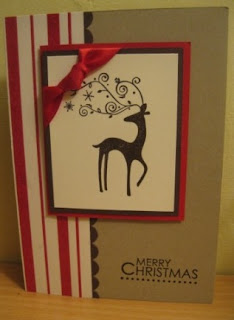
 All but one of my Christmas stamp sets are retiring, I will especially miss Season of Joy and Dasher, but I now have lots of space for some new ones!!!
Recipe
Stamp Set: Season of Joy, four frames
Ink: Chocolate Chip, Real Red & Wild Wasabi
Card: Real Red, Chocolate Chip, Whisper Wild, Whisper White and Very Vanilla
Accessories: Real Red Satin Ribbon, Soft Suede 1 1/4" grossgrain ribbon, Decorative Label Punch, 1/2" Circle Punch

Sunday, 9 September 2012

Owl Builder Punch.

Here are the rest of my Owl Builder creations, a few use another punch as well. Here are some Christmas ones.
Santa Owl

Penguin


I used other punches with these two.
Rudolph, uses Bird Builder Punch for his antlers


Girl also uses 1" circle punch.


Here is the whole display


Saturday, 8 September 2012

When's an Owl not an Owl?

Before you say Eh, I am on about the brilliant Stampin' Up Owl Builder Punch!  This punch is so versatile you can make all sorts of owls with it, from super hero owl to a bride and groom. You can also make lots of other things, from ghosts and faces to cats and penguins, just google it. I made a little display on an 8" x 8" canvas showing a small sample of what you can do, I got my ideas from the internet but can't really name just one source.
 I will show you the whole canvas tomorrow, but here are some of my characters. If you take a close look you will also notice I used one of my favourite punches the dotted scallop ribbon border punch in different ways.
The Bride and Groom


Owl Pirate


Tulip


Alien
I had great fun making these, did get very sticky though! I will show you the rest tomorrow.

Saturday, 1 September 2012

New Autumn and Winter Catalogue

Woo Hoo, the day has finally arrived, we have our very first Stampin' Up Autumn Winter Catalogue in line with Stampin' Up in the US!!! It runs up to January 2013 and is crammed full of Seasonal Goodies, my wish list is getting longer by the minute.  There are also some great bundle offers so you even save some pounds, (to buy more things off your wish list!).
Click here to take a look
As I have been away on my holidays I haven't had chance to pre-order anything, but my order has gone in today so samples should be coming soon.  If you would like to place an order or get your hands on a copy please let me know.