Thursday, 31 May 2012

Join Stampin' Up for only £99

This post will stay at the top till end of May, please scroll down to see new posts, thanks.
It is an AMAZING time to join Stampin' Up and my team of Classy Crafters! Not only have we got our first Summer Mini Catalogue, but Stampin' Up have introduced an amazing NEW STARTER KIT.
Join Stampin’ Up! your way . . . with a completely customisable Starter Kit for just £99 worth up to £175!
This is a fantastic kit as you can design it to meet your needs.
  • Want to be a hobby demo? No problem, you get to choose £130 of products for only £99 delivered Free to your door, then all the benefits of being a Stampin' Up demo, (e.g. discounts on your orders and being able to pre order the gorgeous products from the mini!). 
  • Want to start your own business? No problem, you also get a business supplies pack valued at £45 to help you get your business up and running  plus amazing support from ME and the Stampin' Up family!
PLUS join in MAY and Stampin' Up will give YOU (and all new demonstrators) FREE registration for the European Convention 2012 in Mainz Germany 2nd & 3rd November - worth a further £149!  All you are required to do is book your travel & accomodation.
What are you waiting for? Contact me to find out how easy it is to become an Independent Stampin' Up Demonstrator and take advantage of this fantastic offer throughout May 2012 and join the Classy Crafters!

Sunday, 27 May 2012

Mixed Blossom and Milk Carton Die

Yesterday we labelled  the Mixed Blossom stamp set today I will show you a couple of projects we made with it at class on Wednesday. The first is a card, I used a colour combination of rich razzleberry, not quite navy and river rock, haven't used this combo before but I like it. The background is rich razzleberry ran through the vintage wallpaper embossing folder.

The second project was a milk carton, this is so easy to make with the mini milk carton die.  To make the butterfly just trim off a petal at the top and bottom. This time I used rich razzleberry DSP and embossed it using the vintage wall paper folder.


Saturday, 26 May 2012

Mixed Blossom and clear mount

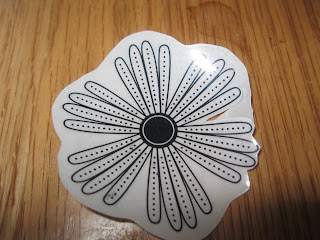
Last Saturday I went to Leeds with my downline Ailsa for Stampin' Up regional training.  We had a great time and I came back full of ideas. I finally got my hands on the Mixed blossom stamp set which I've been waiting for - I didn't buy it as I knew that we were getting it at training - and I love it!
One of the lovely demo's at my table gave me a great tip for putting the labels on the clear mount and I thought I'd share it with you.
As i'm a bit of a messy crafter my clear stamps have got a habit of falling off the block because they are not always clean! Not any more though, just peel the label off the sheet but dont pull the back off.
Trim around as close to the edge as you can.


Then mount it on the stamp.
As you can see from the photo (as I haven't pressed all the label down yet so you can tell), there is a lot more of the spongy bit showing and it sticks to your clear blocks so much better.  It does take longer to do but you will find it's worth it!
Tomorrow I will show you some things I made with it.

Saturday, 19 May 2012

Stampin" Up tea shoppe


This is the other card we made at class, sorry I'm a bit late posting it, time slips by! It uses the tea shoppe stamp set from the new summer mini catalogue.  I love this stamp set and I'm sure you will be seeing a lot of it on my blog.

The colour scheme is baja breeze and blushing bride and the designer paper is it twitterpated. We used a mask to make the flowers look as if they are coming out the tea cup.  Stamp the tea cup image on your card then stamp it again on scrap paper.  Cut the tea cup out, just cutting inside the line otherwise you will get a shadow effect.  Now place the scrap tea cup over the one on your card and stamp the flowers so the stems are in the tea cup.  This is a really easy technique and great for adding dimension to your cards.  The sentiment and label stamp stamp from the set fit perfectly with the modern label punch so you can quickly punch it out. The flower is made using the boho blossom flower punch and topped with a pearl.


This is the tea shoppe stamp set, it costs £24.95 for the clear mount set and £30.95 for the wood mounted set. just contact me if you would like to purchase it.
Tea Shoppe - Wood-Mount Stamp

Sunday, 13 May 2012

Stampin' Up Blossom Punch


I thought I would share what we made in the Summer Mini class. Firstly we got a bit punch drunk making some flowers using the new blossom punch. The modern label punch fits inside for a great effect, use three, then the 1 3/8" circle then the 1" circle and finally the boho blossom punch, topped off with a twitterpated designer button.  The first flower went on a card,


The paper is from the twitterpated designer series and the stamp is oval all. That gorgeous ribbon is the new pleated satin ribbon in blushing bride. 
The second flower we used to top a box we made using the new simply scored tool, it is so easy to make boxes using this and i used the adorning edges embossing folder on the box lid before I made it up, actually I forgot and had to undo it, emboss it and then stick it back together again! Good job I hadn't used sticky strip!!!


They make a lovely set and ideal if you are giving a little jewellery gift. I will share another card we made tomorrow.  Coming to a class is a great way of finding out how different ways of using your stamps, dies, punches etc, trying out new products and having a great time with like minded people.  There is a new class schedule on the class/club page, if you would like to come to a class just let me know.

Tuesday, 1 May 2012

Stampin' Up Summer Mini Blog Hop

Welcome to my blog, you have probably hopped over from Frankiesue's.  I have been very busy with the simply scored tool which I love, this is my creation I have chosen to show you. It's a wreath made with the gorgeous twitterpated papers, fabric and pleated ribbon. The wreath is made of 2 backing cards from DSP packs, I drew around a dinner plate and a tea plate and cut out then wrapped it with some wadding, don't worry, if we make this in class I will get some polysterene wreaths!  I then wrapped some strips of twitterpated fabric around. I think the fabric was about 1 1/2" wide and I sewed the strips together for easiness.

The rosettes are so easy to make using the simply scored tool. I used strips of 12" long  twitterpated DSP, the strips were 1", 1 1/4", 1 1/2" and one 2" wide. I scored them every 1/4". Cut how much of each paper you want to use, (for e.g. 6") and score the whole piece and then cut it into strips. Remember the width of the finished rosette will be twice the width of the strip so a 2" rosette is made from a 1" wide strip. For the large rosette I used two 2" strips stuck together. There are a lot of tutorials on how to make the rosettes or lollies as the US Demo's call them, here is one.


I have used a variety of things to decorate the top of the rosettes. Flowers made using the boho blossom punch and pearls and the twitterpated buttons. The ribbon flowers are made using the new pleated satin ribbon which I love! They are so easy to make, punch a circle out of card stock and cover it with sticky strip, then starting from the outside wrap your ribbon round finishing in the center.


I hope you enjoyed your little stop over, the next hop is over to Angela who I know will have something fantstic to show you.  Thank you for looking.
Here is a list of everyone incase you are a little lost!
1. AlisonP ~ www.craftyalisoninlyon.blogspot.com
2. Crafting Alison ~ www.craftingalison.blogspot.com
3. Sarnie - www.kraftybiker.blogspot.com
4. Pat - www.pinkycardsandcreations.blogspot.com
5. IOW Sarah- www.stampinsarahiow.blogspot.com
6. Frankiesue - www.frankiesue.blogspot.com
7. Anne-Marie - http://classycrafters.blogspot.co.uk/
8. Angela - www.sparklycards.blogspot.com
9. Elaine - www.thesassystampers.blogspot.com
10. Sara - www.craftingandstamping.com
11. FrenchieJo - www.frenchiejo.blogspot.com
12. Leanie - www.beautifulimpressions.co.uk
13. Michelle (ShellieStamps) - www.craftypaper.co.uk
14. Fiona - http://oakfieldcrafts.blogspot.co.uk/
15. Tina F -http://littlewhitehousecrafts.blogspot.com
16. (9399) Amanda - http://thecraftspa.blogspot.com
17. Ruth(mamaluke) www.artfulstampin.co.uk
18. Jan (JJ66) - http://jan-crippin.blogspot.co.uk/
19. Bluedaisy (Tracy) - http://bluedaisydaydreams.blogspot.co.uk/
20. Nuttysgirl (Emily) - http://www.stampinmermaid.blogspot.co.uk/